By: Jay Smith
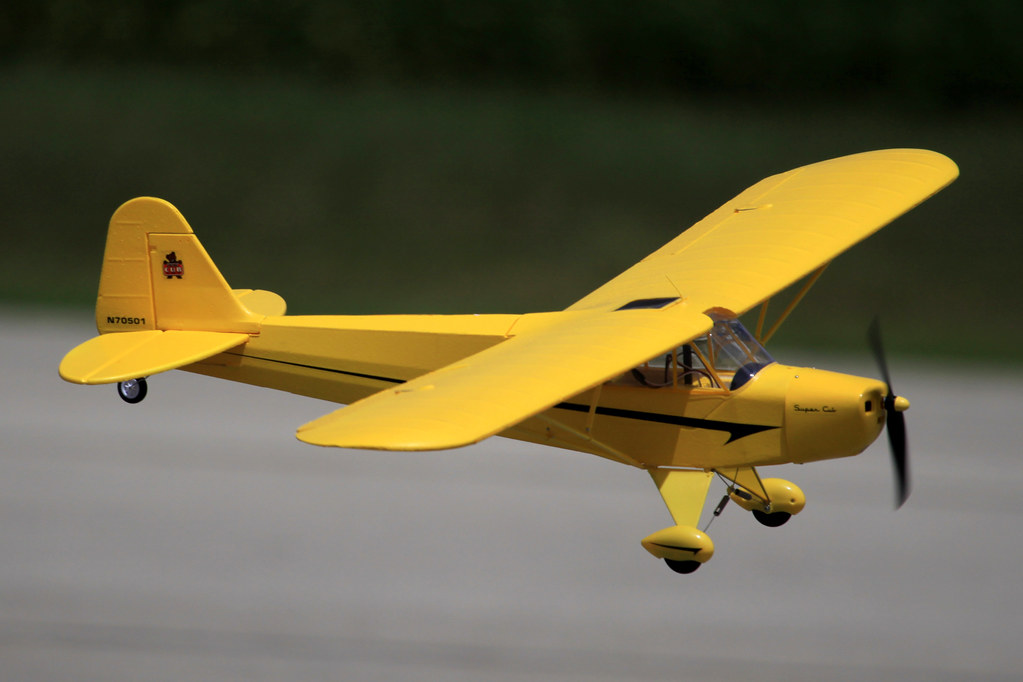
The Piper PA-18 Super Cub is a two-seat, single-engine monoplane first introduced in 1949 by Piper Aircraft. With its distinctive high-wing design and yellow trim scheme, the Piper Cub is one of the most recognizable airplanes in the world. In close to 40 years of production, over 9,000 were built.
Having flown a larger RC Cub, I found myself quite interested in this Super Cub. To me the molded wing ribs and shock absorbing landing gear were some of the features that really stood out. Add to that the fact that it is receiver-ready and the old saying that everyone should own a Cub sounded pretty good.
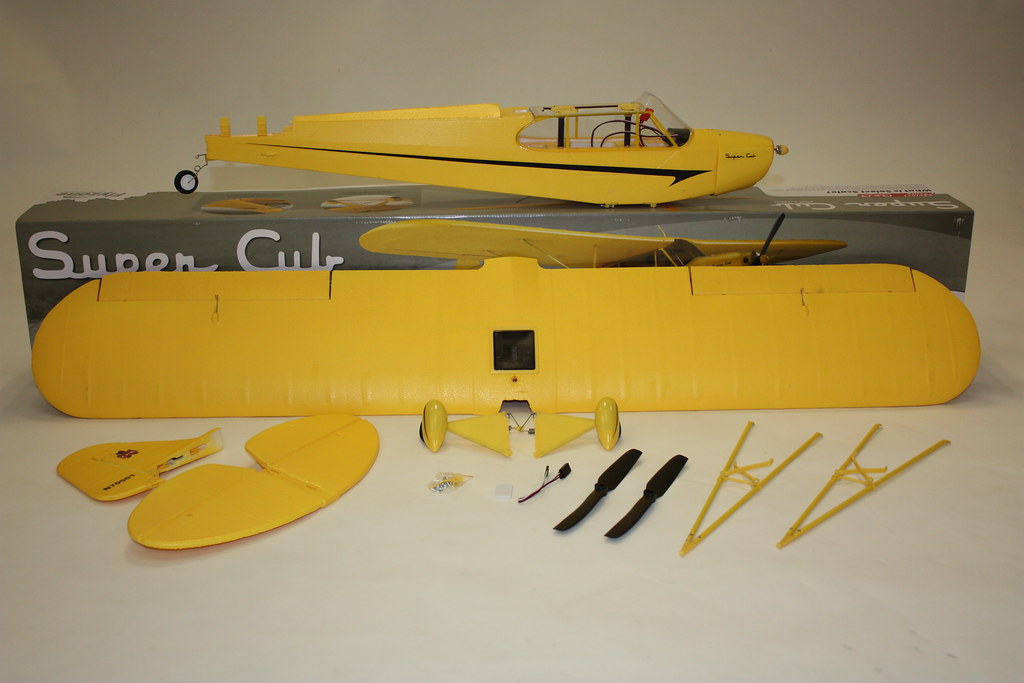
Everything came neatly packaged and undamaged inside the colorful box. The parts count is low, assembly short and only a few tools are required to complete. The manual recommends small needle-nose pliers, a Phillips screwdriver, a small crescent wrench, and some thread locking compound.
The box also carries the Park Pilot Program Legal Aircraft Logo. This states that the FlyZone Super Cub meets all the aircraft requirements of the Academy of Model Aeronautics’ (AMA) Park Pilot Program.
The FlyZone Super Cub therefore weighs less than 2 pounds (the Program’s upper weight limit) and has a level top speed under 60 mph (the Program’s upper speed limit). For complete Park Pilot aircraft details, follow this link.
The AMA Park Pilot Program offers non-AMA members the opportunity to become AMA members at a much reduced cost. Park Pilot membership includes a great magazine “Park Pilot”, $500,000 personal liability insurance, $2.5 million liability insurance for the flying field owner (see insurance details) and membership in the world’s largest sport aviation association – the AMA. For complete information and details about Park Pilot membership, just click here.
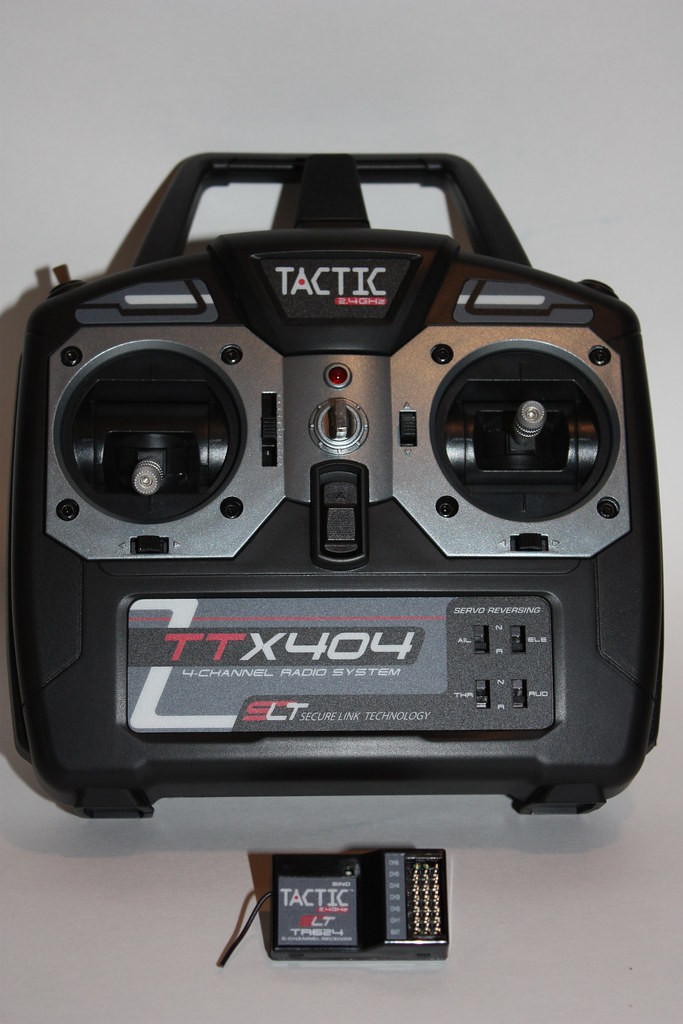
The Tactic TTX404 4-channel transmitter and TR624 6-channel receiver were provided with the review. This is the same radio system provided with the Ready-To-Fly version of the Super Cub.
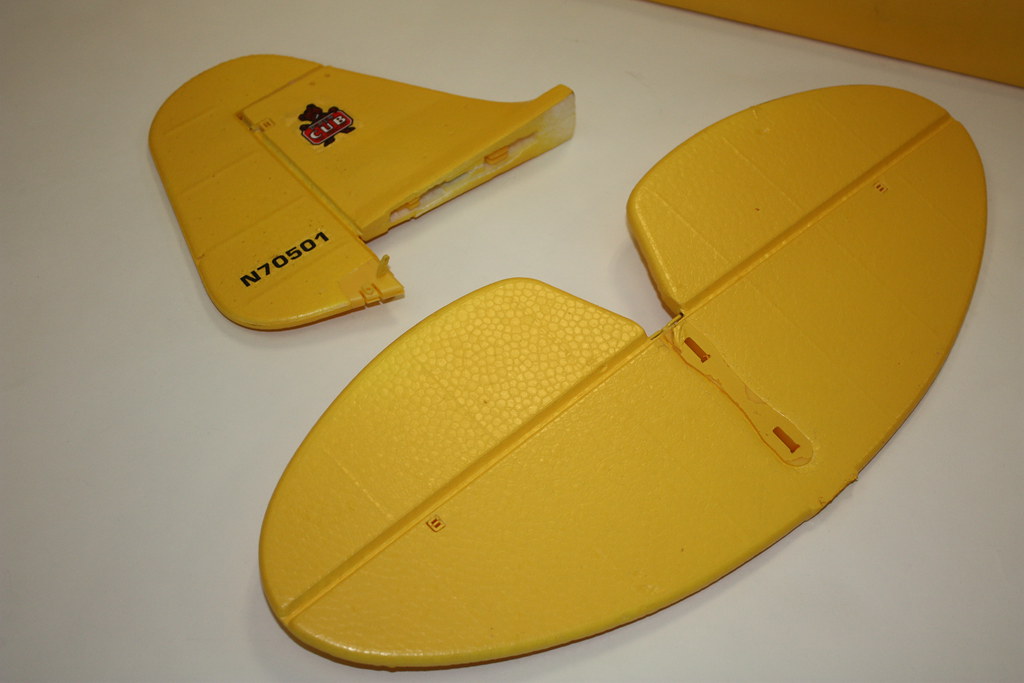
The vertical and horizontal stabilizers arrive pre-hinged and have the control horns already installed. The horizontal stabilizer has two holes in the center to mount it onto the fuselage.
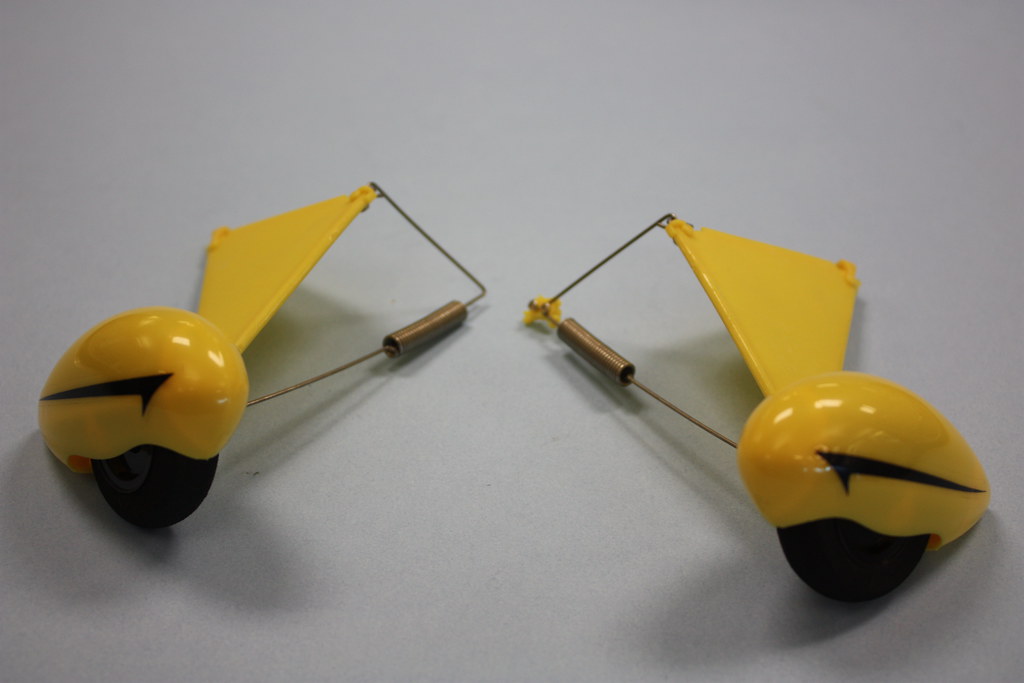
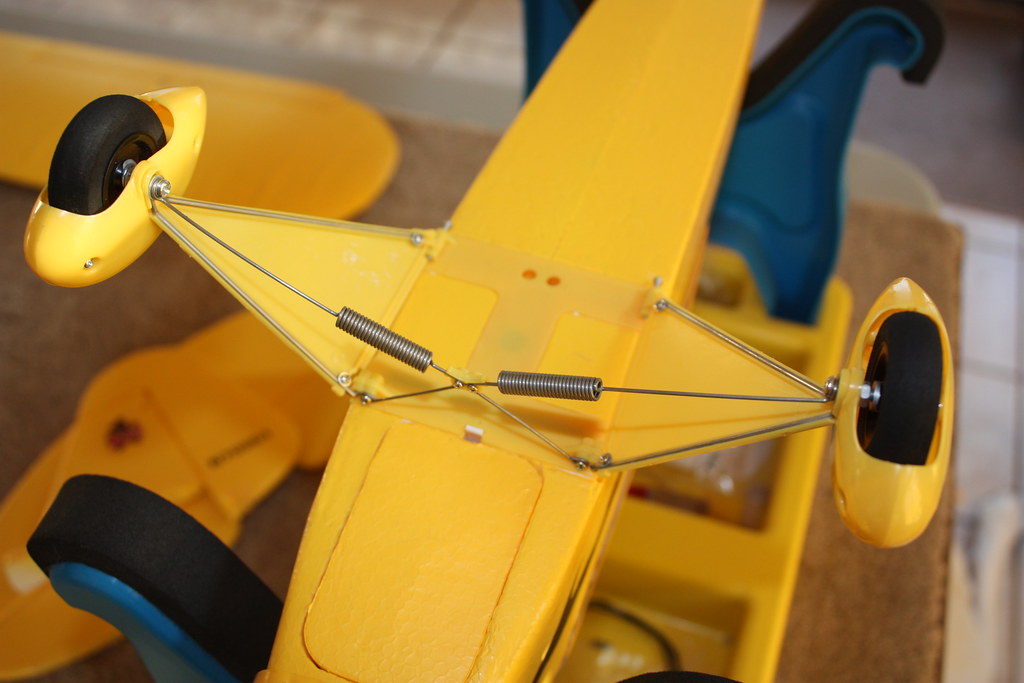
Mounting the landing gear is the first step in the assembly process. The landing gear slides into the front mount and then is attached to the rear mount with the included 2×15 mm Phillips screws. Once both sides are secured, the landing gear springs are then mounted.
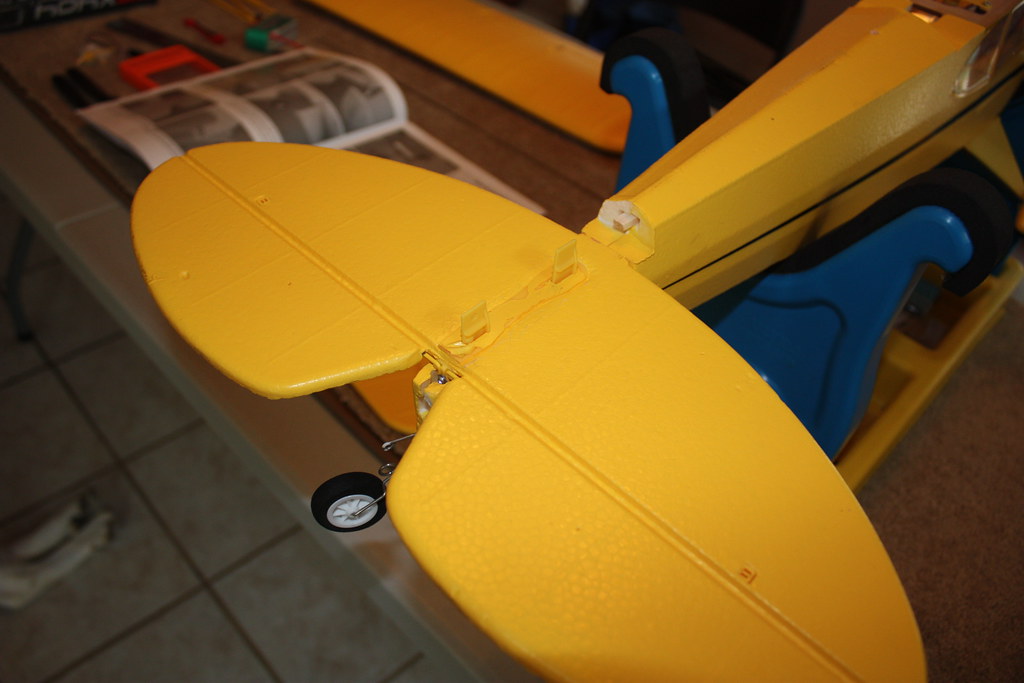
Next up is the mounting of the vertical and horizontal stabilizers. The pushrod for the elevator must be installed in the elevator horn prior to the horizontal stabilizer being attached to the fuselage. It is attached by inserting the two molded-in guide posts into the stabilizer. Once mounted, be sure the elevator control horn moves freely inside the fuselage.
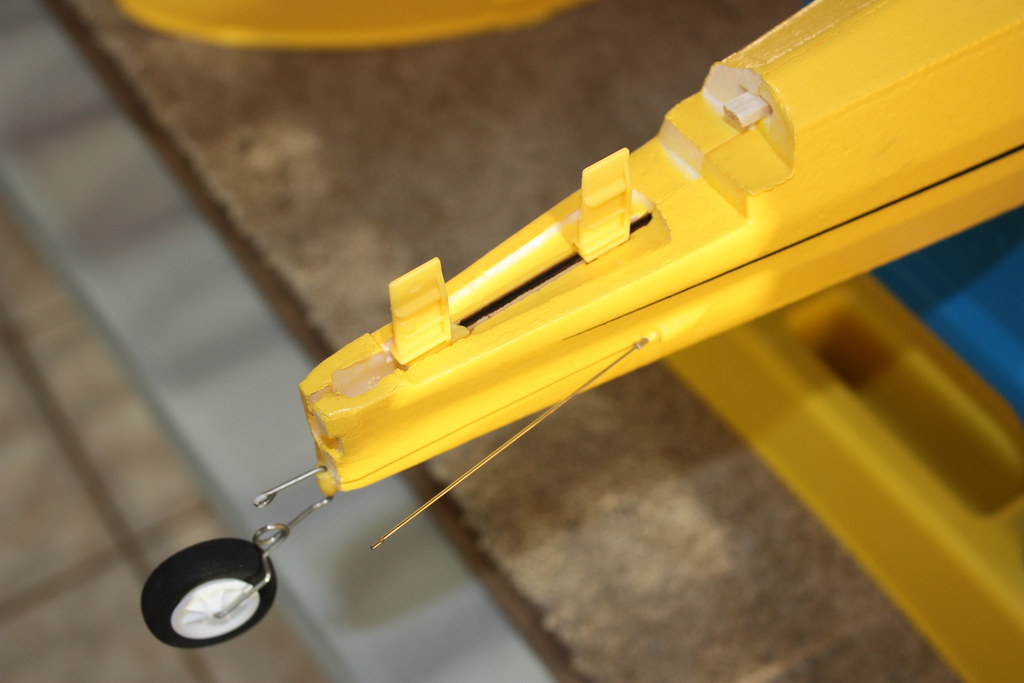
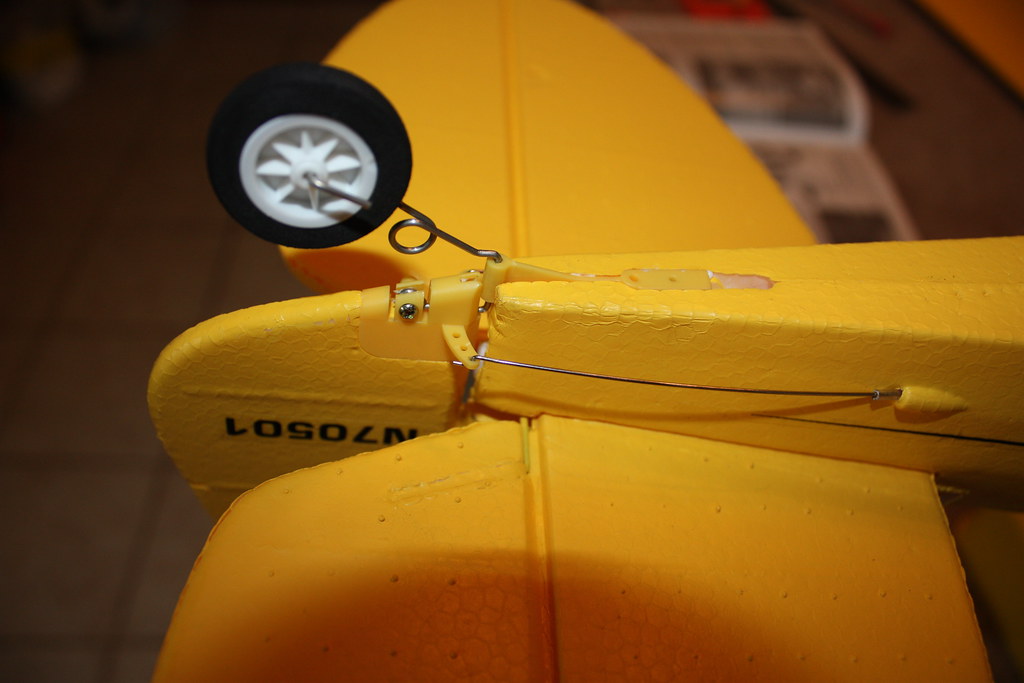 Prior to mounting the vertical stabilizer, both of the pushrods for the rudder need to be attached. At this point, the tail gear wire needs to be inserted into the rudder. The vertical stabilizer then slides forward and locks into place. A 2×6 mm Phillips screw is used to fasten the tail gear to the rudder.

The rudder and elevator servos come already installed and have screw-lock connectors making it easy to setup and center the controls. Make sure that the transmitter trim levers are also centered while setting the control surfaces to neutral
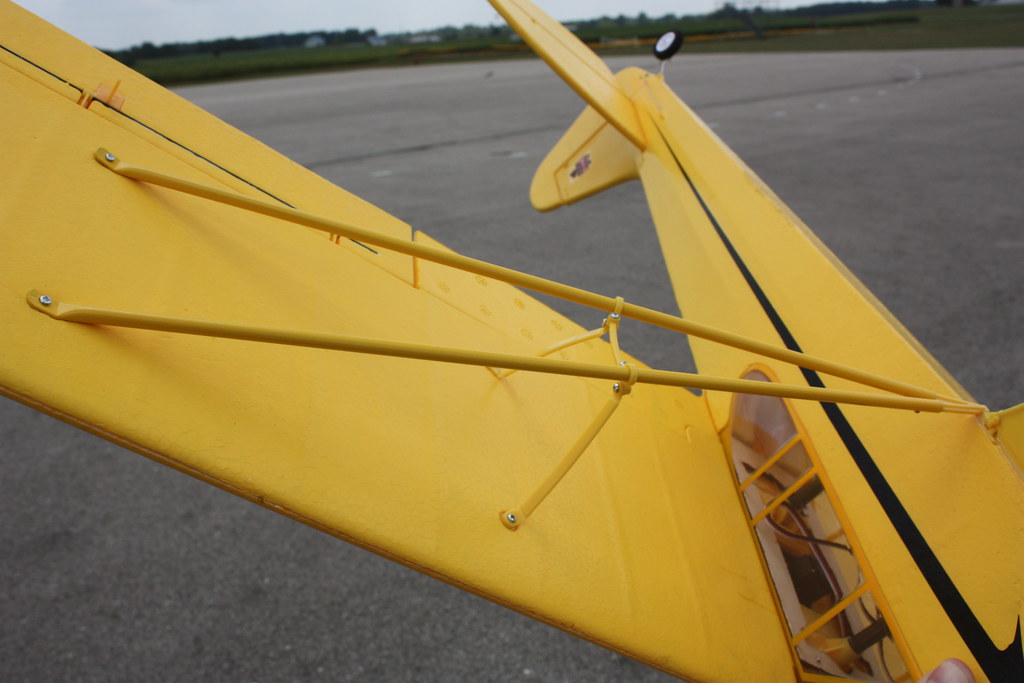
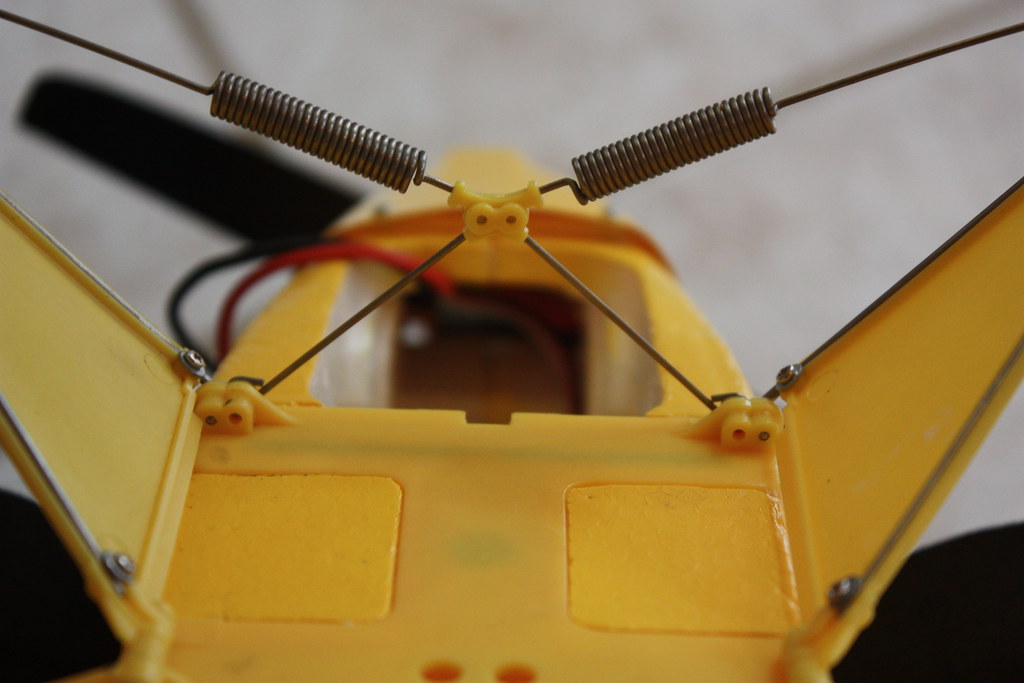
The aileron servo is attached to the receiver via the included servo extension. Then the wing is mounted by sliding it back to lock it in and then a 3×10 mm Phillips screw holds it in place. Once the wing is in place, the struts are attached via 2×8 mm Phillips screws.
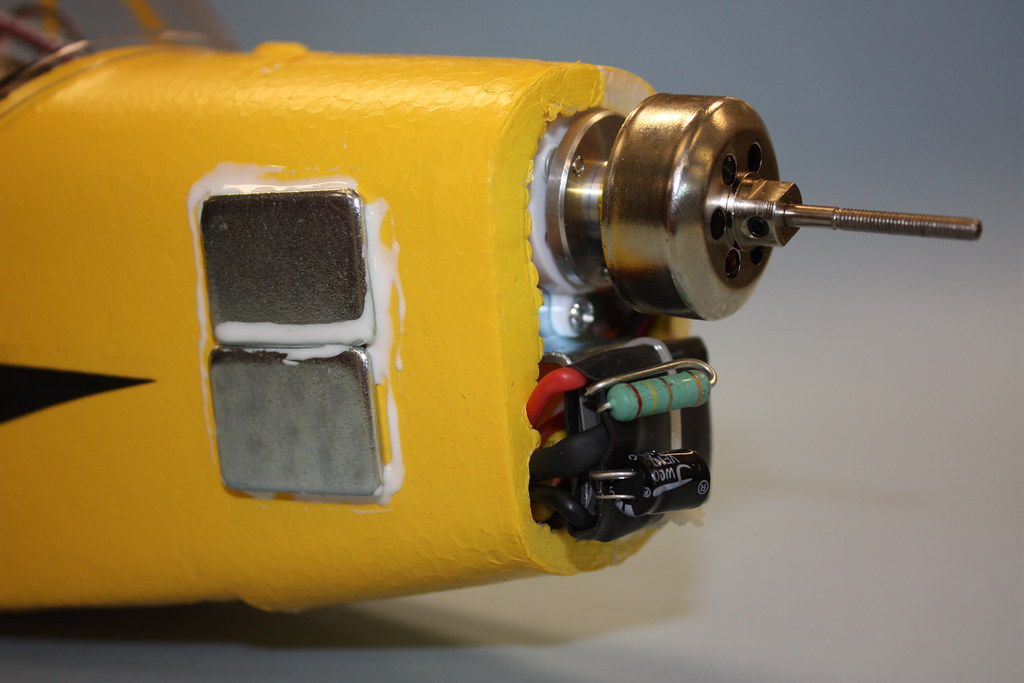
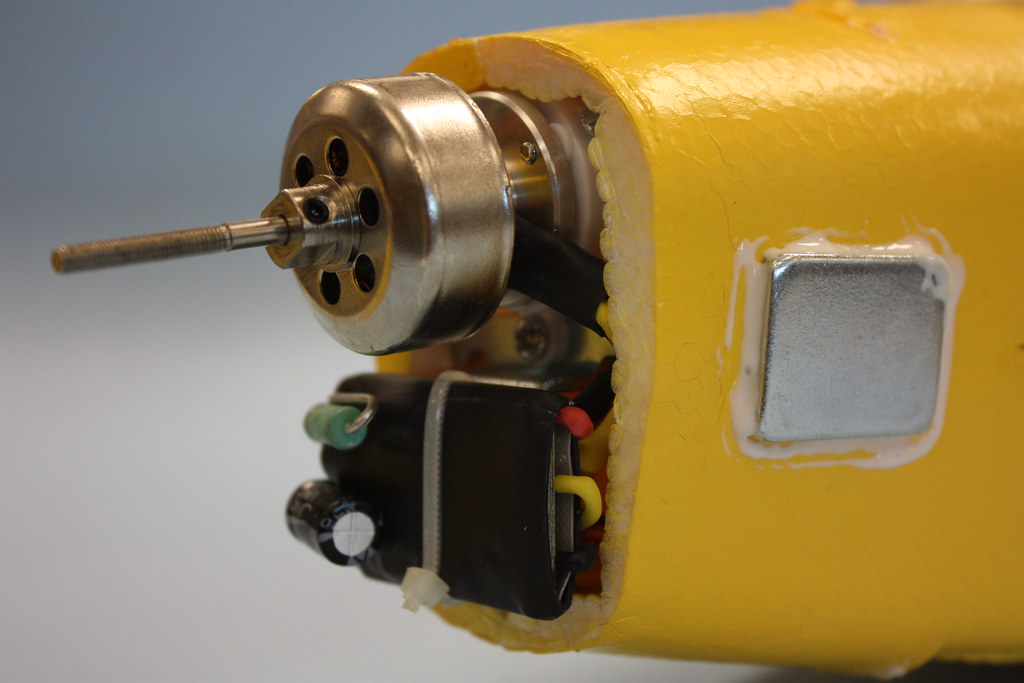
Removing the cowl is not required during the assembly process. As you can see in the above photos, weight has been added to the front of the fuselage to reach the recommended Center of Gravity (CG). Also pictured are the motor and speed controller that come pre-installed.
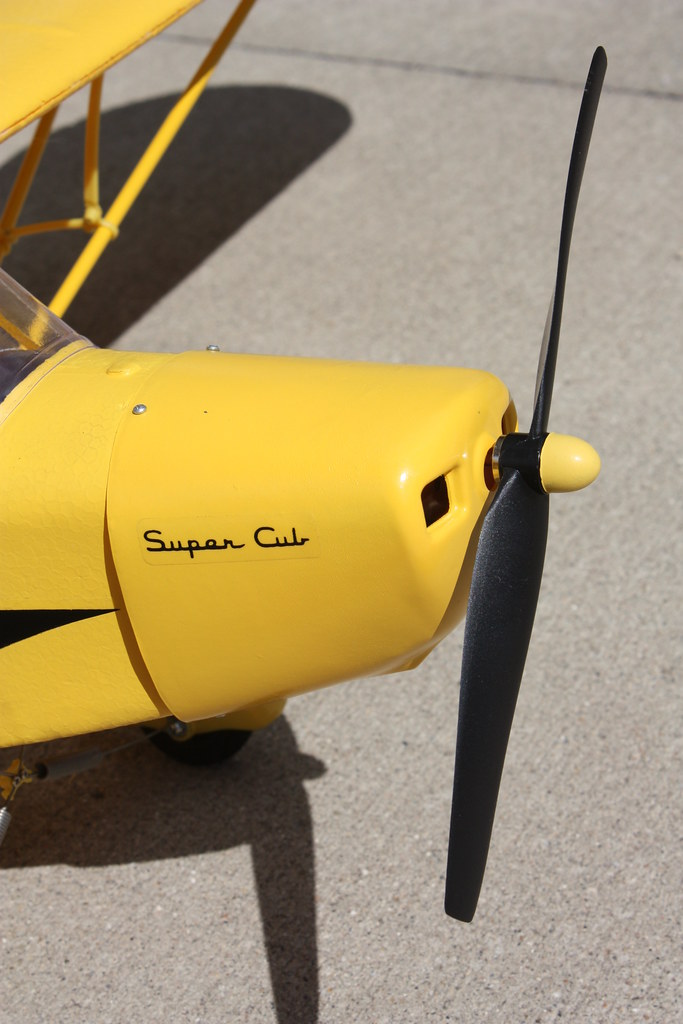
Prior to mounting the propeller, I checked the airplane’s CG and was happy to see it was well balanced. After the propeller was installed, I used a small drop of Welder Glue to attach the spinner.

The receiver is attached to the side of the fuselage with double stick tape. It can be accessed by removing the battery cover.
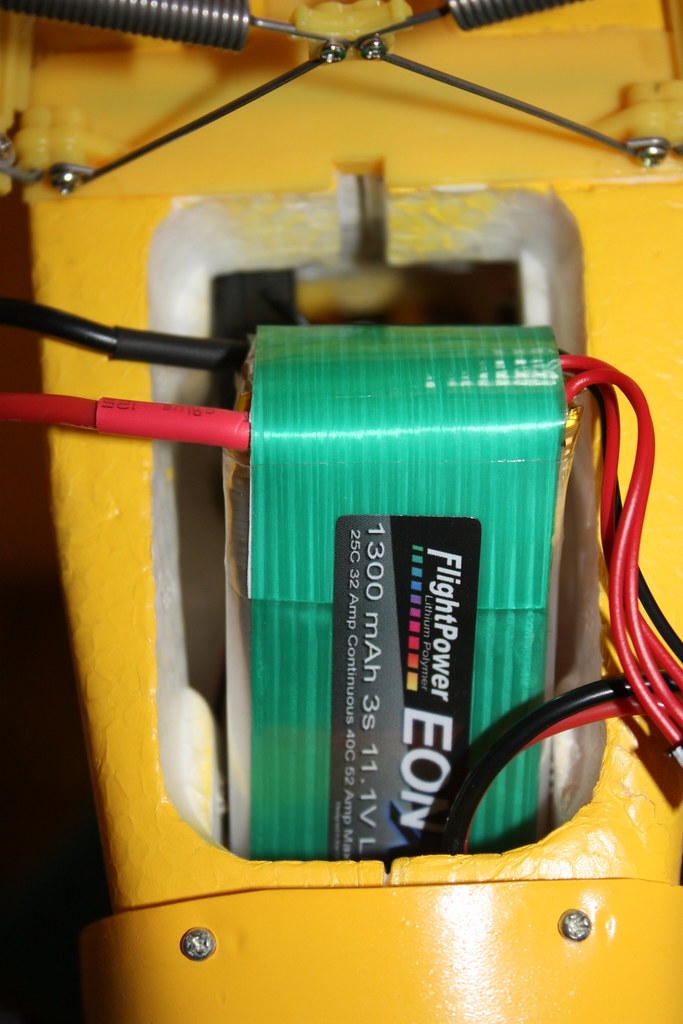
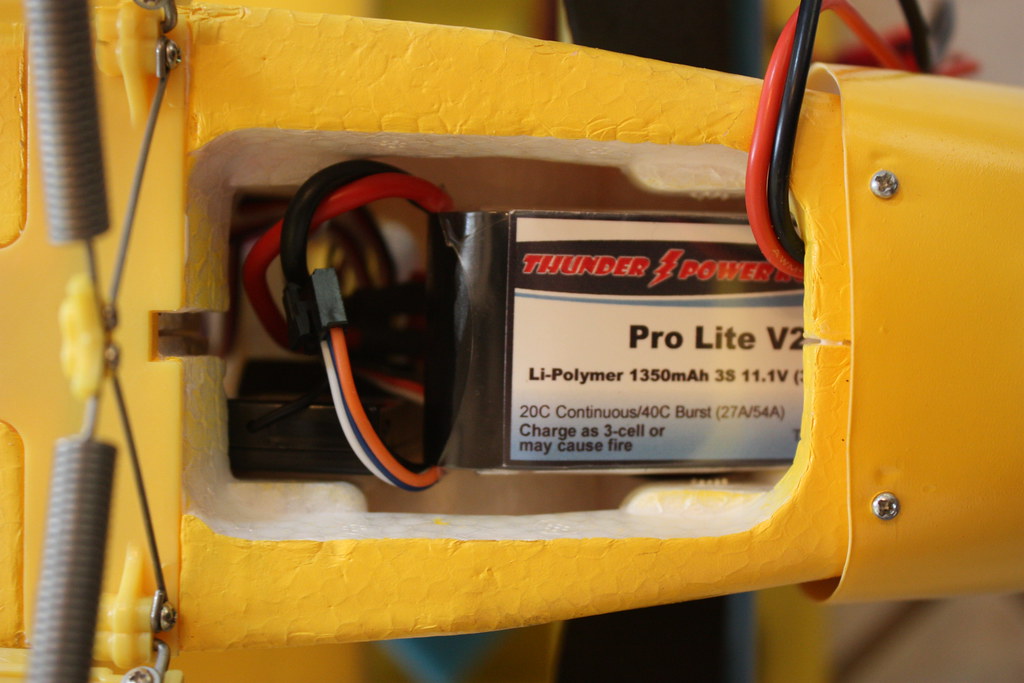
The recommended 11.1 Volt, 1300 mAh battery for the Super Cub was not available in time for the review. Therefore, in its place, a FlightPower 1300 mAh battery was used which requires a small amount of foam to be removed to fit properly. Also tested was a Thunder Power Pro Lite V2 1350 mAh battery that fit without modification. By the time you read this, the recommended Hobbico LiPo should be available.

The completed Super Cub weighs in at 26.6 ounces minus its battery. I was happy to find it fell within the CG range of 2 to 2.5 inches behind the leading edge of the wing. All surfaces were checked to confirm they were moving in the proper direction and were centered.
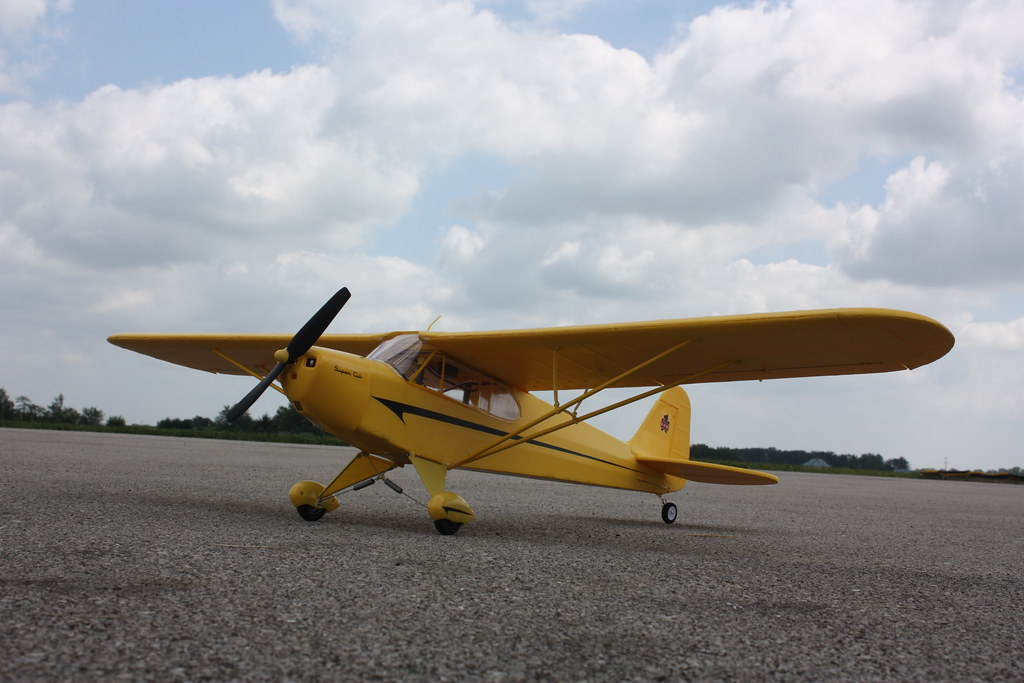
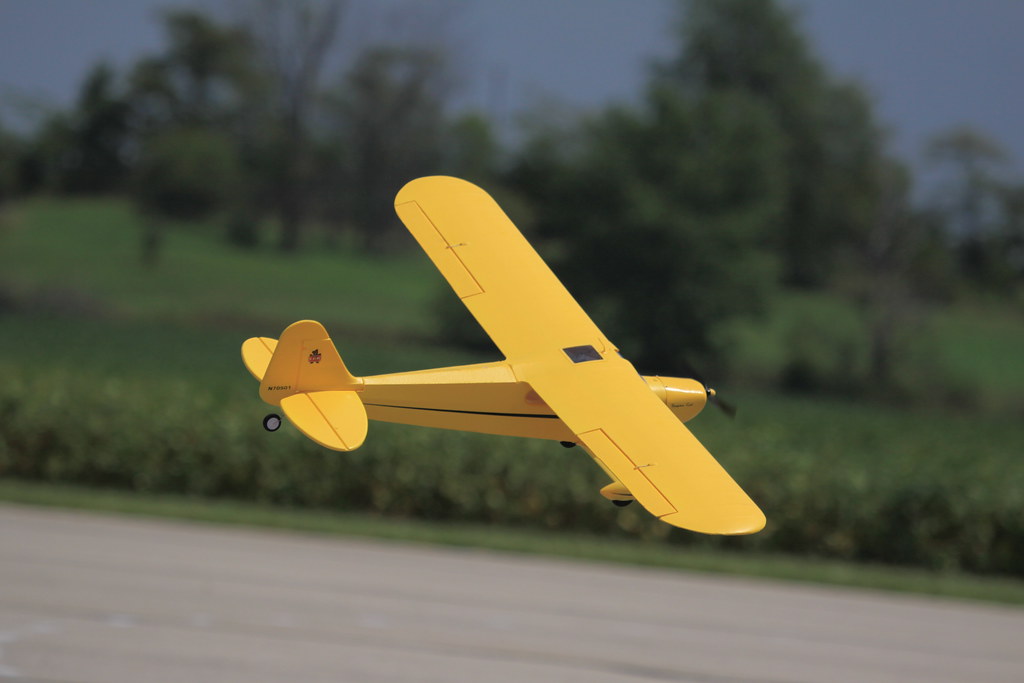
The Super Cub really looks nice no matter what angle you view it from. The detailing of the model is thoughtful for something in this size and price range.

The main gear and tail wheel offer a lot of clearance and allow the Cub to be flown from both paved and grass runways. The ground handling on the Super Cub is good and only required minor rudder input to keep it tracking straight.
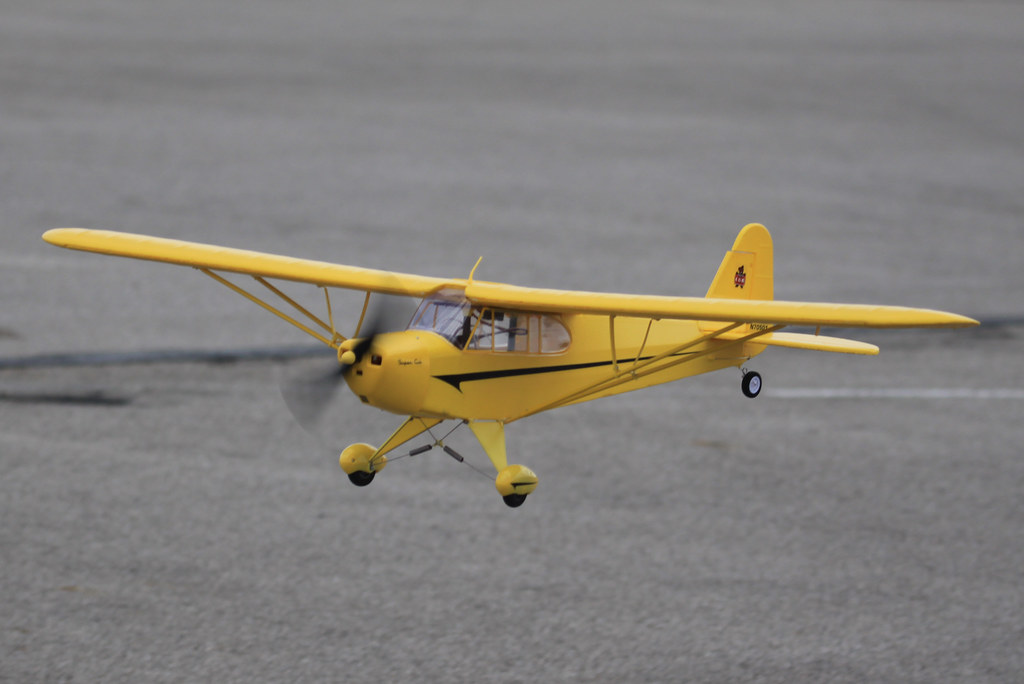
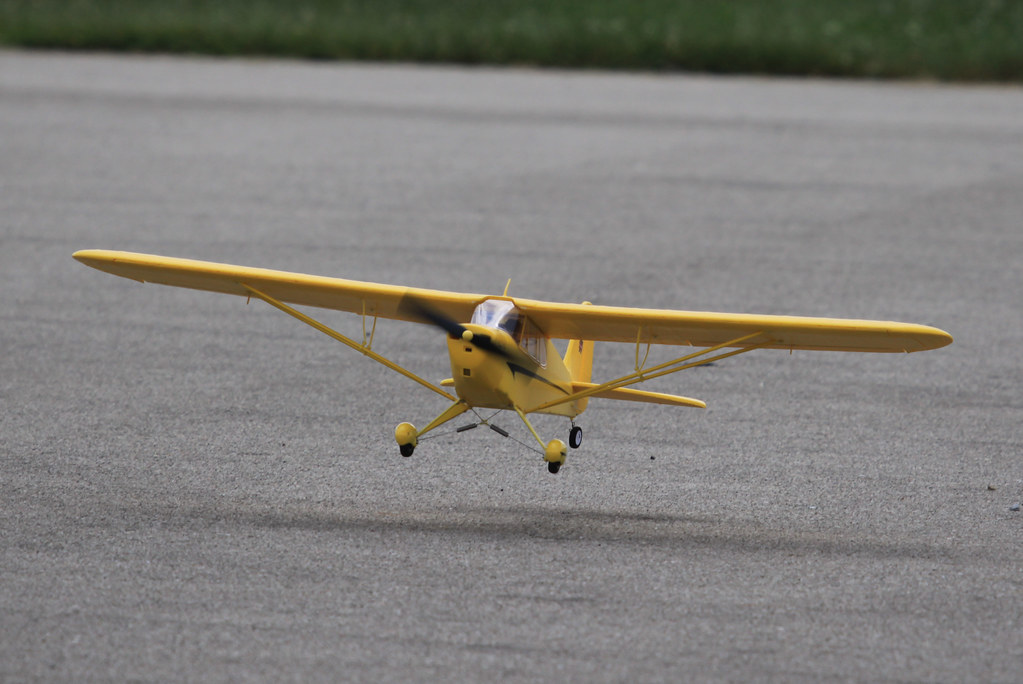
The Super Cub has plenty of power and is capable of taking off from a paved surface in less than 15 feet. Most takeoffs were done directly into the wind using three quarters throttle and a slight amount of up elevator.
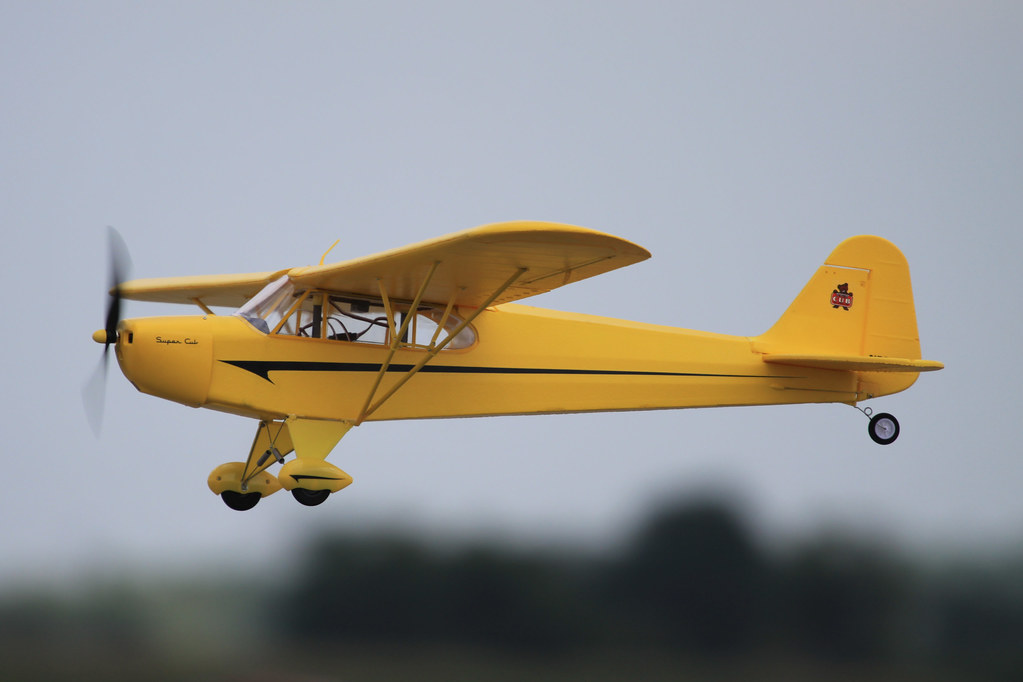
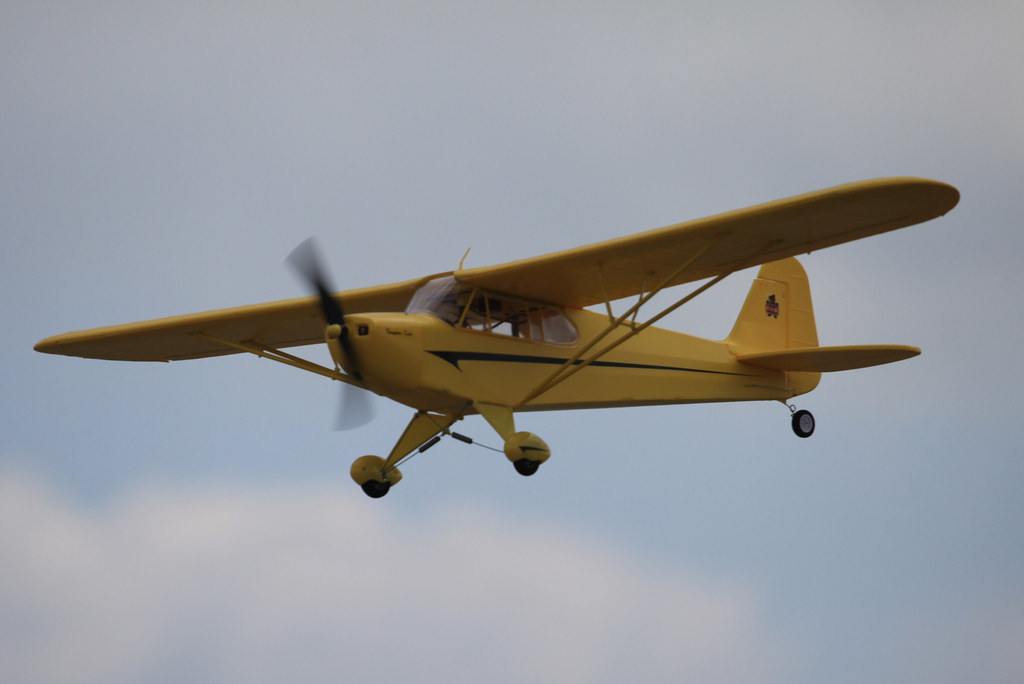
Cruise speed on the Super Cub is comfortable at about 50-60 percent throttle. Full throttle will allow a spirited vertical climb of about 25 feet, providing plenty of power on tap to get you out of trouble.

While the Cub can easily loop from level flight and eat up the sky at full throttle, I find the Cub to be the most enjoyable when flown at scale speeds. The Cub is also quite responsive to the rudder and can be turned effectively on the rudder alone, with the ailerons just being used to level the wing. Anyone looking to give their rudder thumb a workout will appreciate this airplane. If you’re not comfortable flying with rudder, the Cub can be flown with just ailerons and elevator.
(Editor’s Note: The rudder is there for a reason. It will save your airplane from snap rolls on low-speed takeoffs, it overcomes adverse yaw on aileron turns at low airspeeds, it also allows straight takeoffs eliminating those annoying left turns during takeoffs. In short, use it all the time for more professional and safer RC flying).
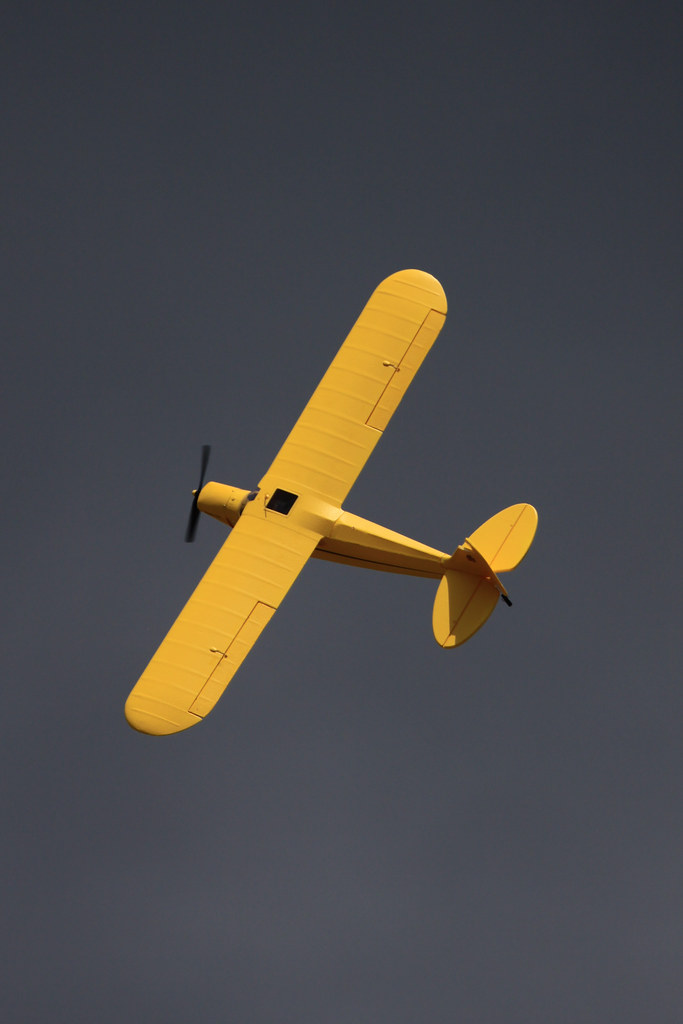
Stall testing an aircraft is always important and as you can see in the video, this airplane has good manors. Using full up elevator, the nose drops when the stall is invoked but it then recovers itself without dropping the wing.

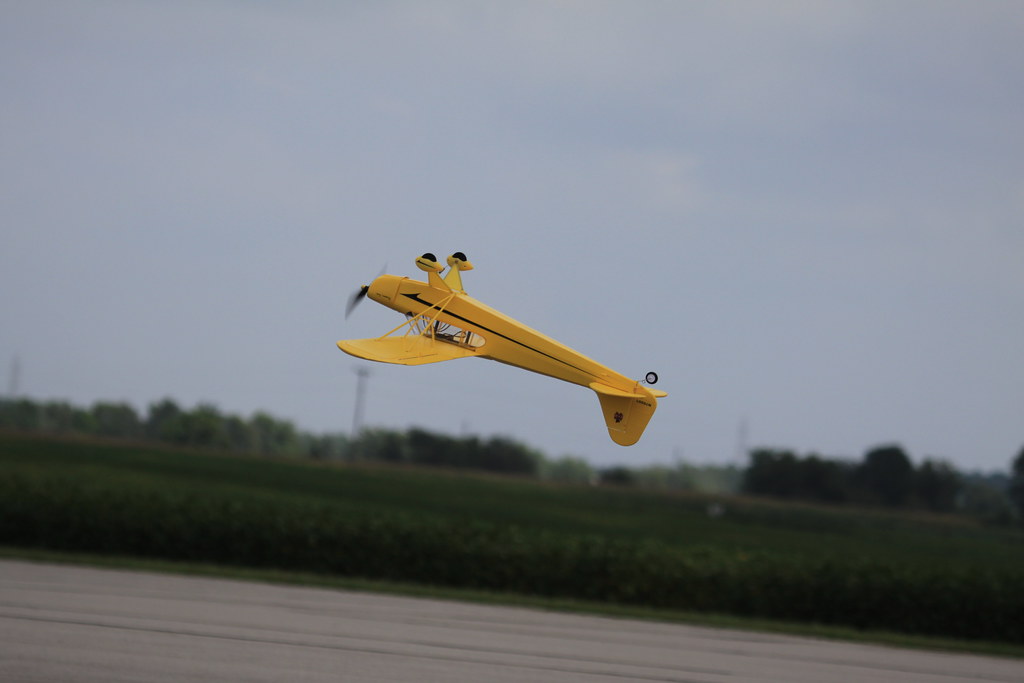
Just in case I haven’t yet convinced you that a Cub is best flown like a Cub, knife-edge and inverted flight were tested. In both cases, this aircraft is capable of being flown through these maneuvers but the Cub’s high-wing with dihedral makes the pilot work much harder to maintain the maneuvers then would be required of a mid or low wing aircraft.
The hammerhead or stall turn is by far one of the most fun aerobatic maneuver to fly with the Super Cub. It has the power, at full throttle, to climb vertically and the very effective rudder kicks the plane over to either side nicely. Just maintain a small amount of power and input full rudder just before the airplane runs out of steam and you will be rewarded with a beautiful maneuver.
The Super Cub will also spin nicely when full up elevator and full aileron and rudder are used at the stall. When you are ready to end the spin, simply release the sticks and the Cub will recover on its own with the pilot just needing to input up elevator to halt the decent. If you decide to attempt a spin, just give yourself plenty of altitude until you are comfortable how the Cub will react.
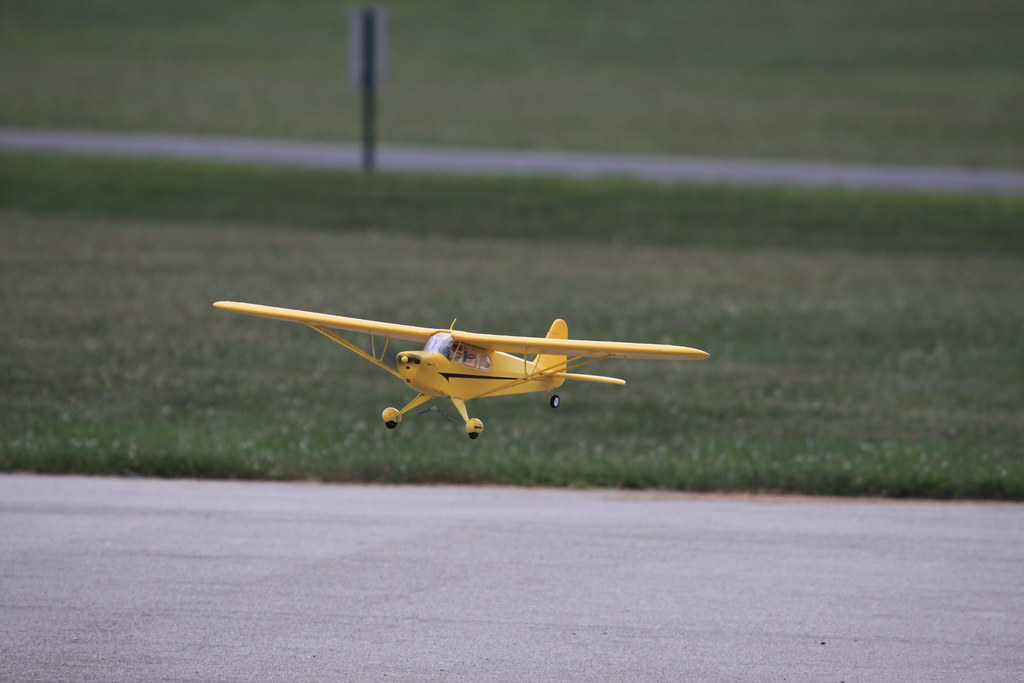
The Super Cub has proved to be well behaved in the air and it won’t bite on landing either. Line her up for landing and gently reduce power and she will settle in. Just a slight input of up elevator while holding a little power provides a nice scale landing. The bungee landing will also help on those less than perfect landings.

FlyZone has provided prospective Cub pilots with the option of a Ready-To-Fly or Receiver Ready model. Very minor assembly is required and not even a drop of glue was used.
Flying this model has satisfied my desire to have a Cub I can keep assembled and ready to go in a moments notice. Its flight characteristics come with no surprises, allowing it to be a relaxing flyer with ample flight times.
Add to that its durable construction, pre-applied decals, and scale detailing all add up to a classic looking Cub. It has even received compliments at my local flying site.
For more information on this fine aircraft, go to: http://www.flyzoneplanes.com/airplanes/hcaa2527/index.html
Additional Aircraft Specifications
Manufacturer: FlyZone
- Cost: $139.98 & 219.99
- Length: 33 in.
- Wingspan: 48 in.
- Radio: Tactic TTX404
- Wing Area: 354 sq. in.
- Servos: 3 x FlyZone
- Wing Loading: 12.4 oz./sq. ft.
- Motor: FlyZone Brushless
- Weight: 30.4 oz.
Airfoil: Under-Cambered
- ESC: 18 Amp FlyZone
- Battery: 3-cell, 11.1 V 1300 mAh Lithium Polymer
- Special Airframe Features: Under-Cambered Airfoil, Airframe of 3 mm extruded polystyrene foam, Quick Assembly.
Notable Positives
- Great Semi-Scale Looks
- Easy Assembly
- Low Parts count
- Shock Absorbing Landing Gear
- Relaxing Flight Characteristics
Notable Negatives
- Battery compartment may need to be enlarged to accommodate 1300mAh battery
Videos:


No comments:
Post a Comment